 M40
Review - Ranger Rick's SOS NecklaceM40
Review - Ranger Rick's SOS Necklace
M40
Review - Ranger Rick's SOS NecklaceM40
Review - Ranger Rick's SOS NecklaceAs the author of a wilderness survival site, I make it a priority to visit many survival related sites to keep tabs on the type and quality of the information that is being purveyed. One of the sites that I've really enjoyed is by a retired Army Ranger named Rick Tscherne (he refers to himself as "Ranger Rick"). You can see it here: http://www.therangerdigest.com. Rick Tscherne's site, above almost any other site I can name, believes in the same type of zero bullshit practical survival information that I try to convey here.
I was recently contacted by Mr. Tscherne, who asked me to review his SOS (Special Ops Survival) Necklace. It was designed as a small chain a soldier could wear around the neck in conjunction with his "dog-tags" (a nickname for a GI's identification tags). In reality, anyone can wear and use this kit. The unique thing about this kit is that it is worn under the shirt, and is therefore out of sight. Most kits are either in a belt pouch (like mine), or are in some sort of tin, which means you walk around with a big bulge in your pocket.
This kit is a compact bare essentials type, and does not contain a lot of the items you typically find in most kits (fish hooks, band-aids, needles, etc). By bare essentials, I refer to the fact that it provides the means of signaling for rescue, building fire, shelter, and for navigating your way out. This kit is probably not the one I'd want if I was in a long-term survival situation, but most survival situations last hours, maybe overnight... not days or weeks. Mr. Tscherne's kit takes this into account, and also relies on the fact that a kit that you can keep on your person at all times is probably a good kit to own!
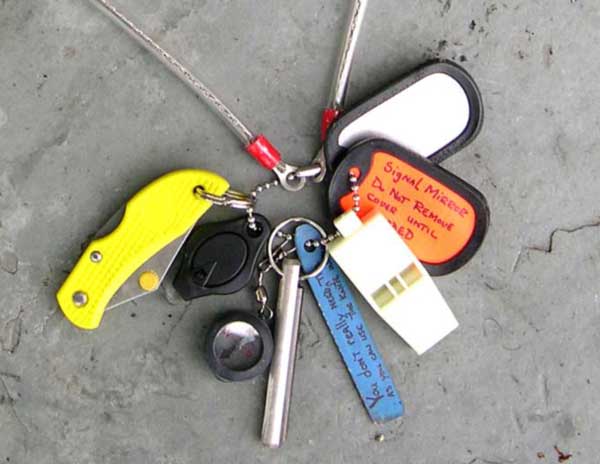
The SOS Necklace Contents
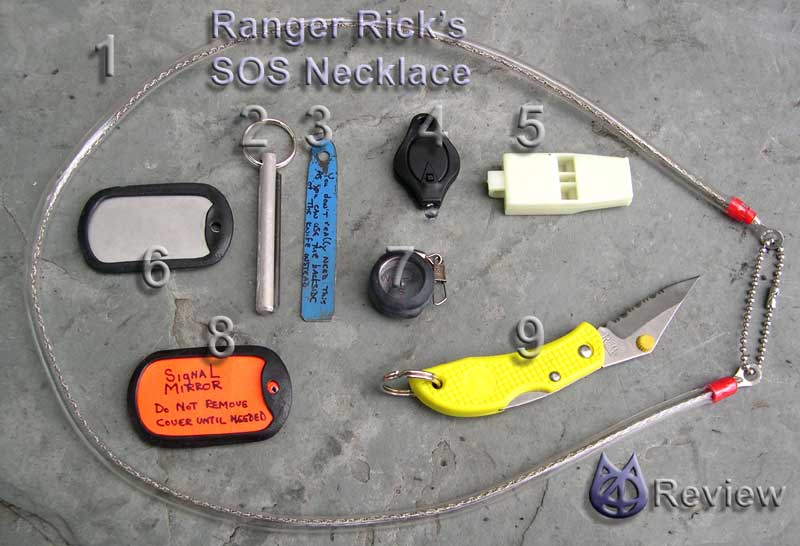
ITEM 1 - The "necklace" in this kit is actually a mini survival saw. While I'm not a big fan of this type of saw, this is actually quite innovative in that it is the necklace portion of the kit. While I usually recommend a good knife or other chopping tool, these cannot always be carried. This saw is completely concealed under one's shirt and can therefore be carried just about anywhere. The saw is enclosed in a protective rubber sleeve (not protecting the saw... protecting your NECK!). I didn't try this because to use it, you actually cut right through the sleeve. (once you've used it, you can't wear it like a necklace anymore). Also, I've used wire saws before, so my "review" is that wire saws suck to use, but they're a lot better than nothing! Once I'm done wearing this for a while, maybe I'll put the wire saw to the test on some non-standard materials and see how it holds up.
ITEM 2 - Magnesium Flintbar - Firestarter / Signaling Device - I LOVE this piece of kit. This is about a quarter the size of the one I typically carry. With a little practice this little item can start hundreds of fires. This is going to replace the one on my keychain!
ITEM 3 - Striker for the Magnesium Flintbar - Though I call it a "striker", you should NEVER actually strike it on the flint. This item appears to have been made from a hacksaw blade, and is thus very hard steel. It makes short work of both shaving the magnesium and to shave some sparks. I have a few recommendations for how to improve this item (read about my recommended changes in the Tests and Modifications section below).
ITEM 4 - Mini LED Flashlight - This is a very bright little light, so you can also use it for signaling at night. I like this item because it has both a fixed on/off switch and momentary pushbutton activation... good thinking Ranger Rick! This item is great for short durations where you need to locate items at night. For longer duration, build a fire. My two cents worth is that you can pack along a couple extra button batteries as well. These could be fastened over the compass with electrical tape to act as protective covers.
ITEM 5 - An obnoxiously LOUD little whistle. Great for signaling, and glows in the dark as well. See my modification in the Tests and Modifications section below.
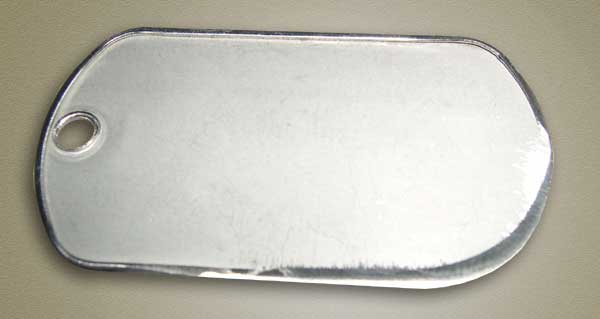
ITEM 6 - This is a plain old GI "dogtag". Ranger Rick recommends sharpening an edge on this item. How sharp can you make a dog-tag? More on that in the Tests and Modifications section below.
ITEM 7 - Compass - For its size, this is not a bad little compass. I've seen quite a few plastic "button" compasses that may or may not point North. This little compass sports an aluminum housing and is actually quite sensitive and fast acting. As such, remember to remove it from the chain before use, as any nearby ferrous metal will make this compass "dance". All in all, this is a nice piece of gear for it's size.
ITEM 8 - Mirror (Signaling, grooming) - A signaling mirror is great for signaling at long distances or to passing ships or aircraft. It can also be used for self inspection. No, I'm not talking about fixing your hairdo, I'm talking about checking wounds, rashes, etc in places you would not otherwise be able to see without being double-jointed. This is also a GI "dogtag", but someone has taken the time to buff it to a mirror finish. It comes with a protective wrap which was paper. I ripped this off immediately, as I'm supposed to beat this stuff up, not baby it. At some point, I'll cover this up with some electrical tape to protect the mirror finish.
ITEM 9 - Small Folding Knife - This is an "el-cheapo" Chinese folder, and I wouldn't expect much from it... did I mention that the entire kit is sold for about $20 ?? Anyhow, I'd recommend either replacing this with a small Swiss Army type knife, or doing what I did ( read about my recommended changes in the Tests and Modifications section below ).
M40's Review
My first impression is that this is a heck of a value at about $20. As I mentioned above, there are a few minor modifications I would make (more on what and how later), but even as delivered, this kit is far better than having nothing! I'm already considering giving these kits as gifts to anyone I know who day-hikes, bikes, jogs in remote areas, etc. Whereas this kit focuses on signaling (whistle, mirror, flashlight, fire), it could save someone even if they possessed zero "survival" skills.
One thing I definitely wanted to test in my review was whether a dog-tag could take a decent edge. Surprisingly the answer is YES. It took me about 5 minutes on my belt sander - I used a medium grit belt to knock down the "lip", a fine belt to shape the edge, and an extremely-fine belt I use to put razor edges on my blades. This would probably take an hour or so with hand tools.
Here's the dog-tag blade I made. The edge extends along the bottom to the front.
Now the big question... will it CUT?
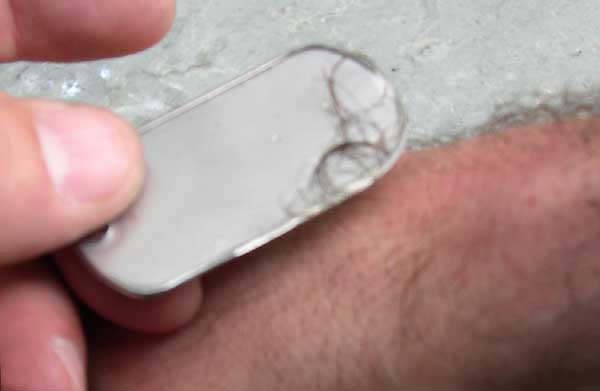
Not only will it cut... it easily mowed up a pile of hair from the back of my arm... not bad!
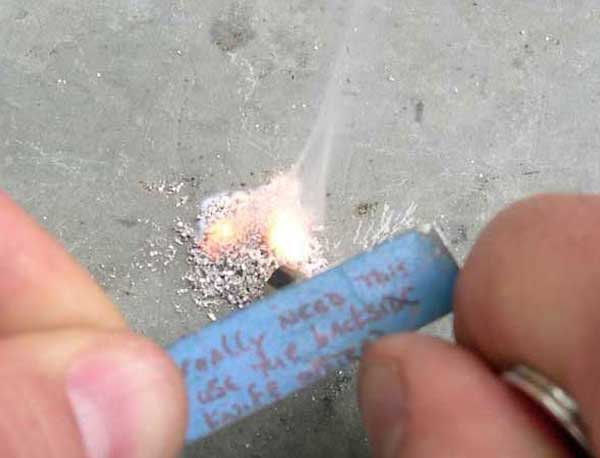
Another item I immediately tested was the magnesium flint bar fire starter. To use these, you just shave the magnesium with a knife or the included striker into a pile about the size of a nickel. Run the striker down the other side, and The magnesium ignites with a flame like a blow torch, and will burn for several seconds. Keep your tinder and fuel ready to pile on, or build the tinder pile around the magnesium in such a way as to still allow the magnesium to be hit with sparks).
The included "striker" easily mowed a nickel-sized pile of shavings in about 30 seconds
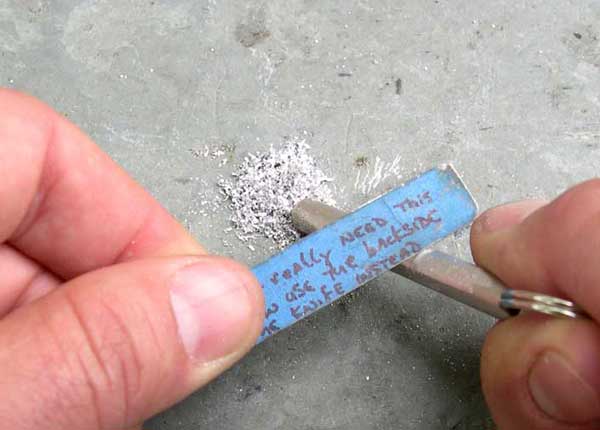
Running the same "striker" down the flint gives a good shower of sparks, and I was able to ignite the pile on the first shot (but I've done this before!)
The little piece of hacksaw blade is what got me to thinking.... Someone went to the trouble of removing the teeth from this, and I wondered why. I use the file on my Gerber Multi-Tool both for making magnesium shavings and for making the spark. It works much better than a straight edge.
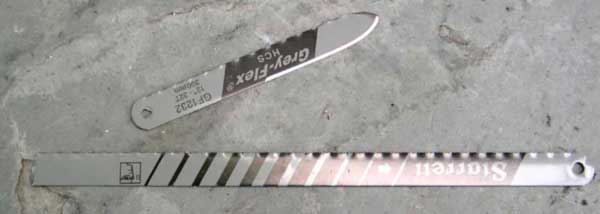
I went and grabbed a hacksaw blade and snapped off a 3.5" section. I tried it and it does work a lot better than a straight edge. After testing this, I decided to make a micro-survival blade out of it. Whereas I'm not a fan of the included blade, I decided to make an all-in-one blade/spear/striker/mini-saw. I put a small spear point on the end of my hacksaw piece and then sharpened the front side (leaving the saw teeth as a saw edge along the back).
Here's the blade next to the remainder of the hacksaw blade I used...
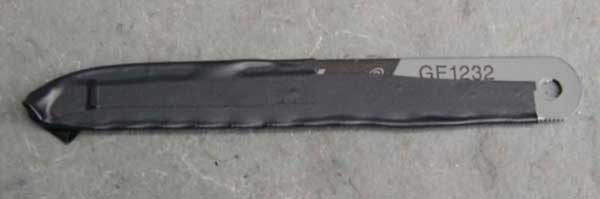
I used a piece of electrical tape to keep it from cutting me while wearing it...
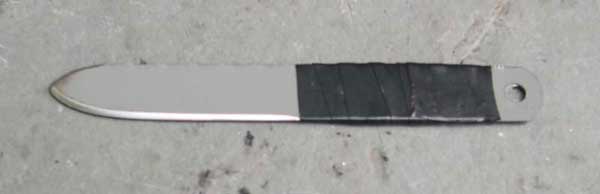
The same electrical tape makes a nice impromptu handle!
If you like this little blade, check out THIS PAGE, where I've taken the mini-blade to a new level !!!
The final mods I made were to make the kit smaller and less obtrusive to wear. The more wearable it is, the better. With the dog-tag blade and the folding knife gone, the kit is a lot smaller. The little hacksaw blade I made fits in nicely without adding bulk. The final impediment to this kit being unobtrusive is the whistle. The lanyard hole on it goes side to side, so it doesn't "play nicely" with the other items. This one is simple. I just drilled a hole the other way (90 degrees from the original) to make it lay flat against the other items.
The rig as received. This is splayed out, so it isn't a fair comparison, but this picture at least gives an idea of the way things hung before my mods.
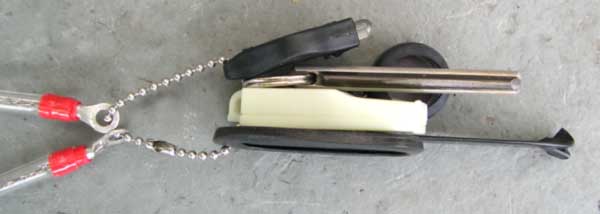
Post modifications, everything is now hanging nicely together. This is now something I don't mind wearing if I'm going for a walk. The whole cluster of stuff shown here is about 1" square by 3.5" long. I may add a quick wrap of electrical tape to hold everything closer together and to keep me from "jingling" when I walk!
Conclusions
My mods were done to show what can be done with this kit, but it's quite usable as received. Everything I did was accomplished in a few hours (including this page!). Bottom line is that you're NOT going to be able to assemble something like this yourself for $20. You'd spend about $30-$40, plus 3 or 4 shipping charges, plus your time to find the stuff, etc. In my estimation, this is an unquestionable deal, so if you're looking for a small but effective kit that you can take anywhere, this one's pretty damned tough to beat!
Find it here: http://www.therangerdigest.com/Tips___Tricks/Necklace/ordering.html
Finally, Rick's site also shows how to add things to the kit such as fish hooks and line, a condom for holding water, etc etc. It's really up to you how you want to customize your kit based on your own expertise and what you have around the house. The one thing I'd really like to see on Rick's site is a nice watertight plastic case that hangs on the chain which fits the contents plus your own add-ons. That would make the kit easier to customize and would keep everything from rattling around. Something a little smaller than an Altoids tin would do nicely.